|
SPLITMUX-DVI-4RT: How to Assign Units Individual Display Modes and Save Presets in Win Mode When Cascading Multiple Units <x> denotes a keyboard key <x> + <y> = press keys simultaneously <x> - <y> = press keys consecutively
Using the On Screen Display (OSD), configure the Master hot key setting to activate with <Ctrl> + <Alt> (manual page 19). Configure each Slave hot key to activate with something else (e.g. <Ctrl> + <Win>). 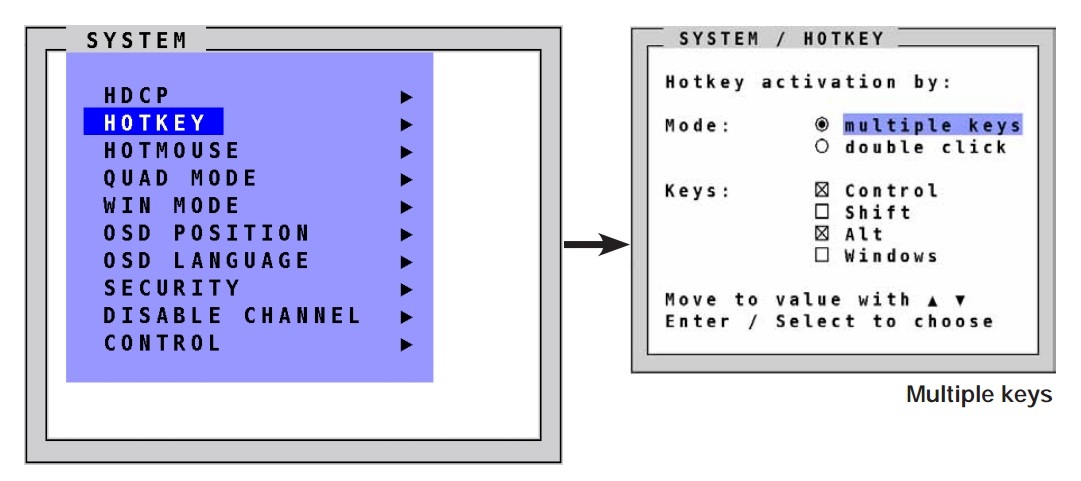

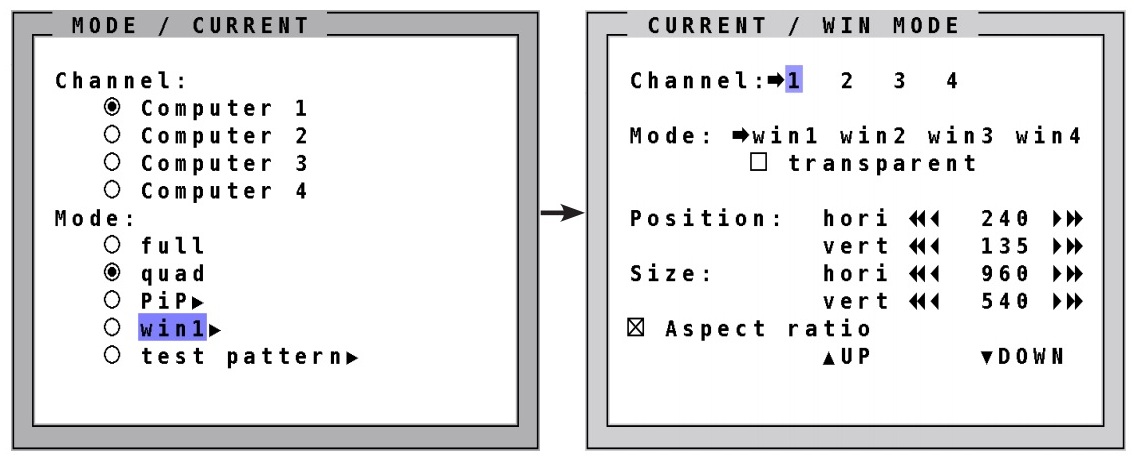
Next, set up Win mode so that the slaves will display the channels as desired, and save that configuration as presets Win1, Win2, Win3 or Win4 (manual page 37). Enter <Ctrl> + <Alt> - <1> (if the slave you want to configure is connected to Channel 1 of the master). Your keystrokes will now control the slave on channel 1. Enter <Ctrl> + <Win> - <O> (letter “O” not zero). This will open the OSD menu on the slave switch. Navigate to the configuration of Win Mode. Select Mode- Current- and Win1 under Mode (manual page 37). Configure the displays on each channel to appear as desired while “Win1” is selected, changing the Position, Size and Aspect ratio as needed. The unit will auto save as you change each parameter. Be sure to adjust these settings for each channel while Win1 is still selected. Repeat steps for presets Win2, Win3 and Win4 as desired.
Now, anytime a channel is selected and placed in Win mode (<Ctrl> + <W>), it will start with your preset display configuration. While in Win mode, you can enter <Ctrl> + <W> + <2> to switch from preset Win1 to preset Win2. Note: the Hotmouse Menu can also be used to configure the presets (manual page 82).
|